Glyphus
|
Glyphus is a chat messaging app without
using words. Send from a selection of images to create messages. It's meant
for small kids who cannot read or write well (or at all) yet still want to
send & receive messages with their parents or siblings.
<< Download at Google
Play Store >>
For instructions and tips on how to use Glyphus, see below…
Note: The screenshots and
the instructions might differ slightly from what you see on your screen because
the app may have been updated since this help guide was created. For example,
the DEBUG label in the top right corner should not appear on anyone’s screen
because that was only displayed on the beta version during development. Also,
this app is “dark mode compatible” which means if your phone theme is in (or
automatically switches to) dark mode, then the white background would be black
on your screen.
Start
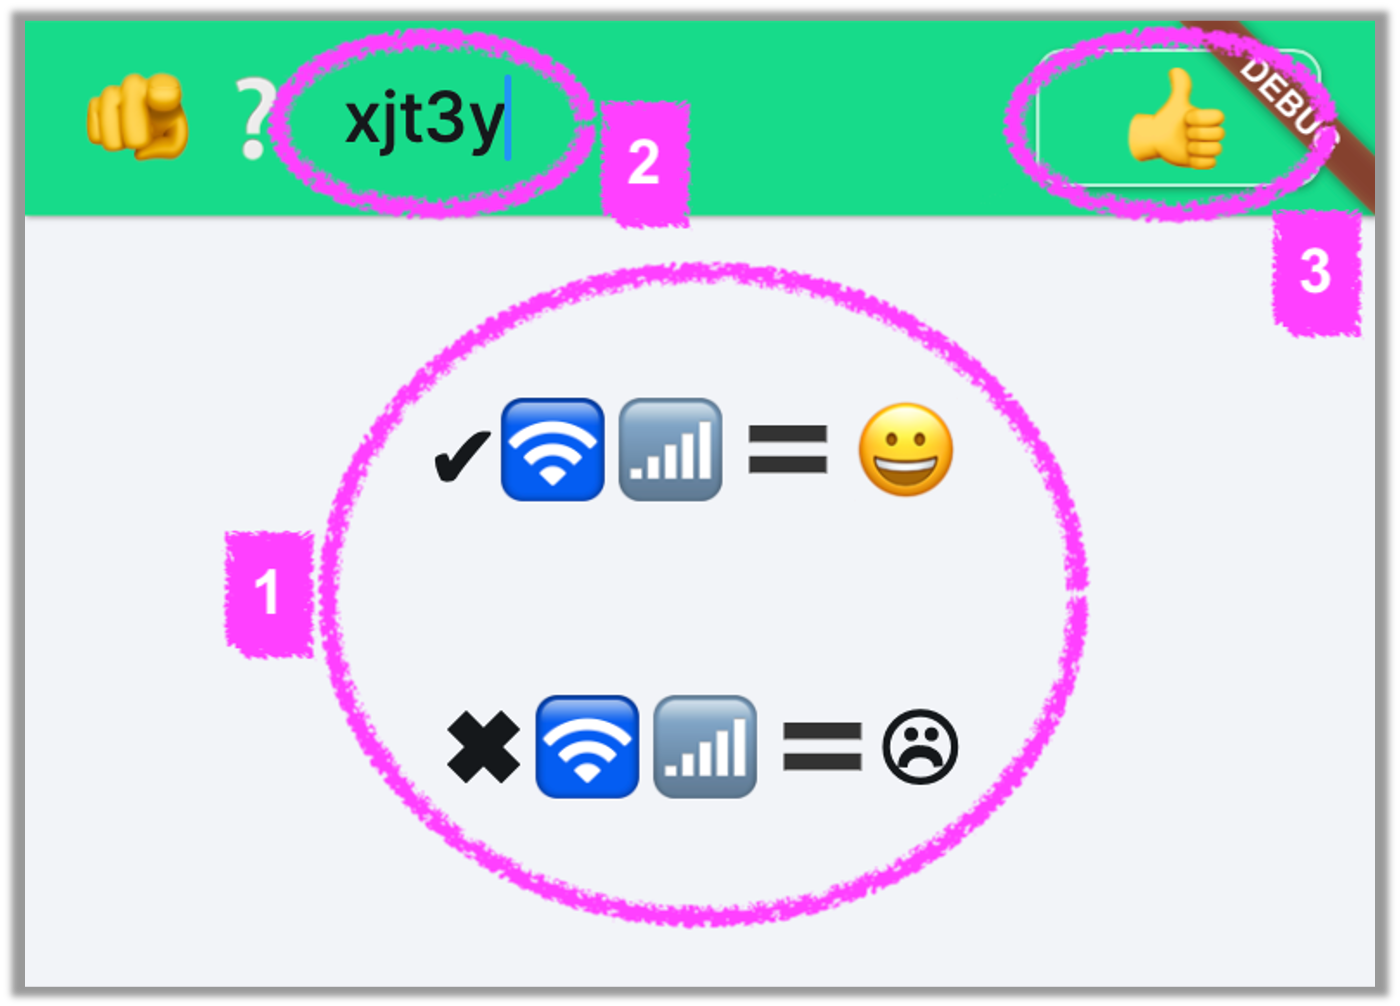
1.
You need to
have an internet connection! Make sure either your WiFi
or your cellular connection is active and you have a signal.
2.
You need to
choose a username. This is the name people will use to find and send you
messages. It is limited to 7 characters but you may include emoticons, like 😆🩷🐸👍.
3.
Once you
decided on a username, hit the Thumbs Up button to accept it.
Note: If someone else already
has that username, you must choose another one. You may also change your
username later without any major consequence. Instructions on how to do that is
at the bottom of this page.
Friend
List / Homepage
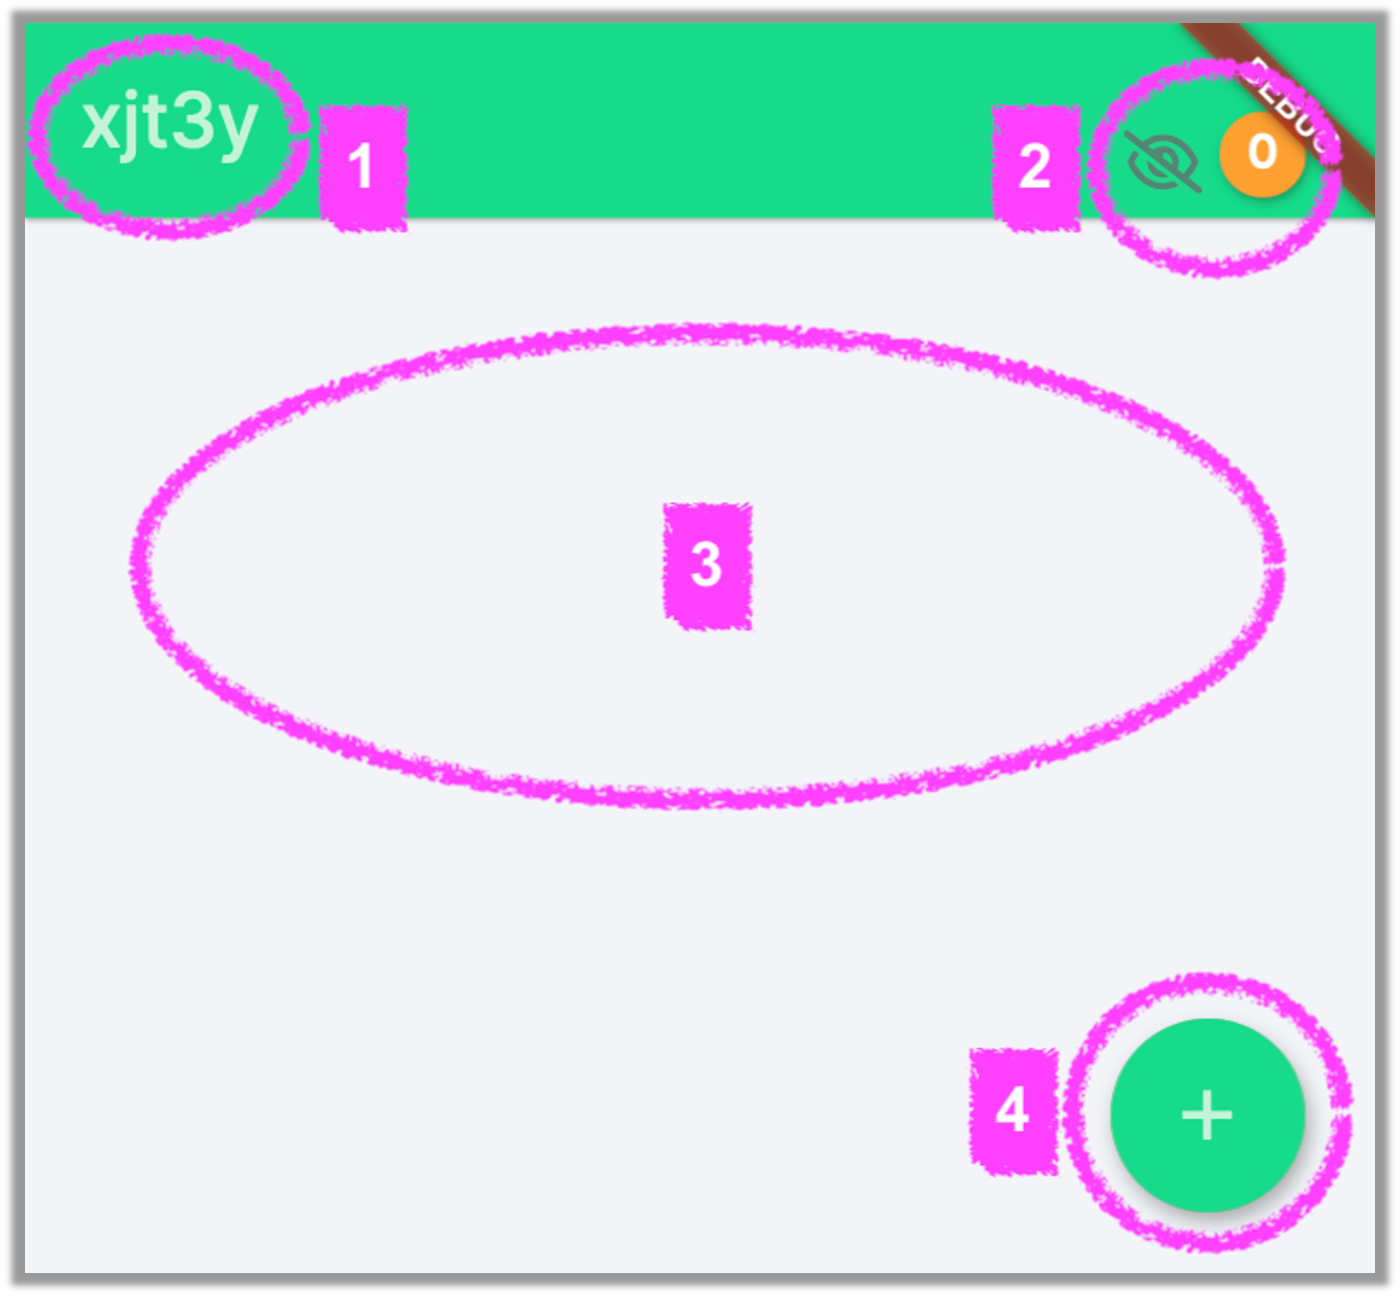
This
is the page you’ll see every time you launch the app again. It features your
Friend List, however it’s empty since you have not added any friends yet.
1.
There is
your username. (If you want to change it, just hold down on it and it will
become editable. More instructions on how to do this will come later—at the
bottom of this help guide.)
2.
The number
in the top right shows the total of unseen images you have received. This
number will refresh every 10 seconds to show you if you have received any new
images.
3.
This is
where your Friend List will appear, if you have at least one friend. However,
when you first get started, this should be blank. (An example of a Friend List
is shown later, below.)
4.
You will
need to hit this Plus button to add a friend to your Friend List.
Add
Friend
1.
This is
where you need to enter your friend’s username.
2.
After
entering your friend’s username, hit the Thumbs Up button to add it to your
Friend List.
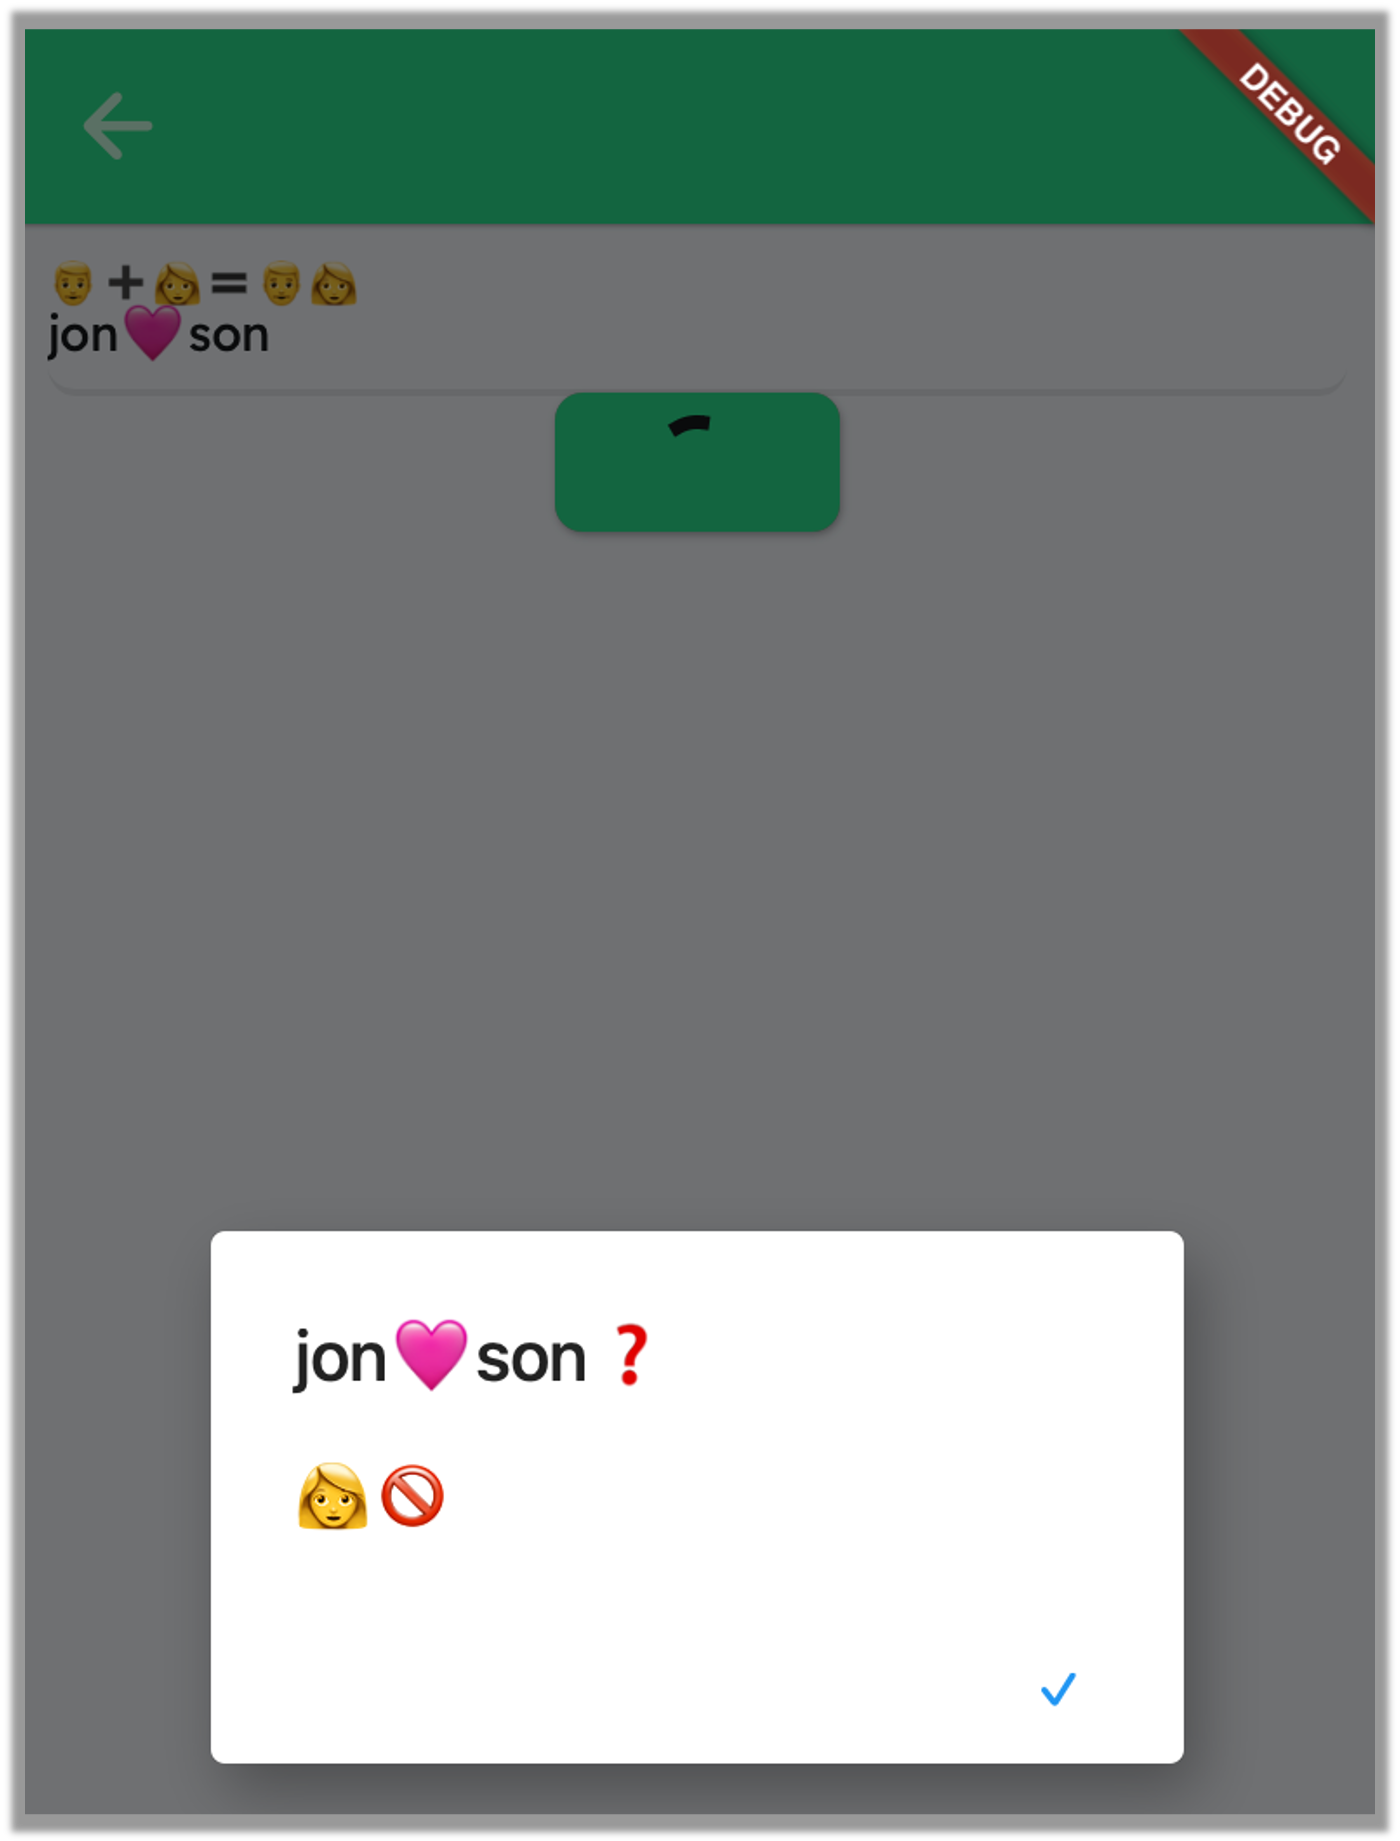
Note: If the friend username
you entered is not in the database, it will produce an error, like this…
Note: Before you can receive
messages from friends (a) you need to add them to your Friend List and (b) they
need to add you to their Friend List. This is a safety measure so you do not
receive any messages from strangers. If a stranger guesses your username and
adds you to their Friend List, and even sends you a message, you will not
receive it unless you also add their username to your Friend List.
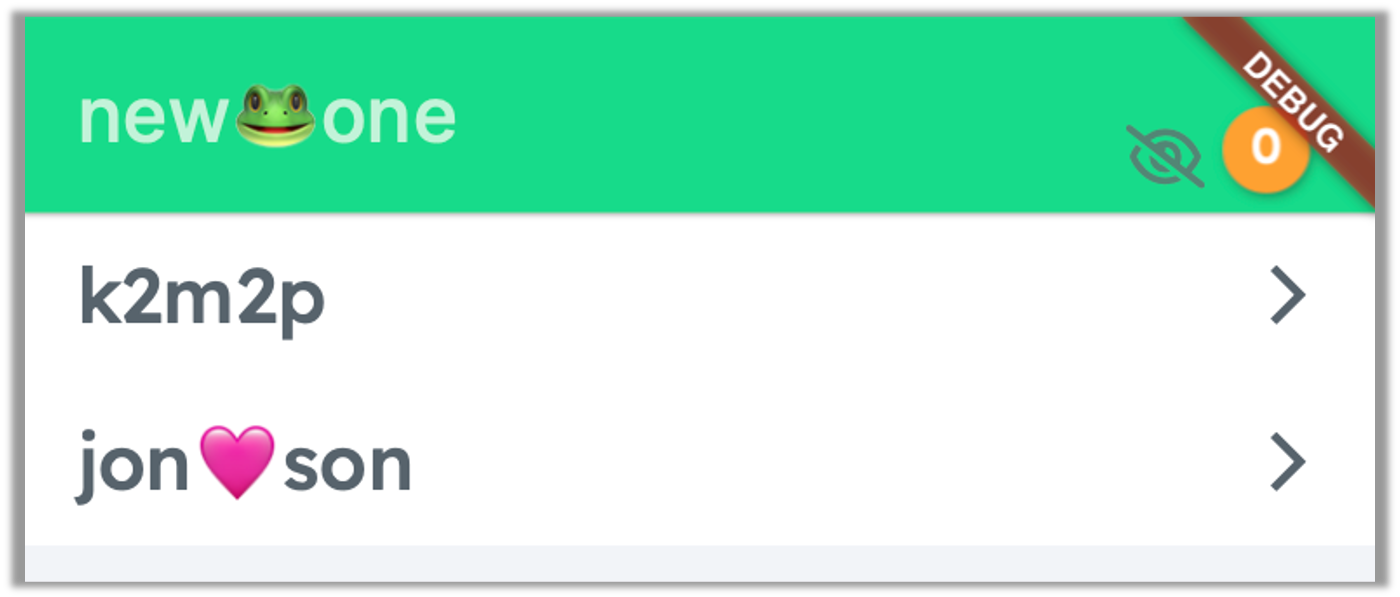
Friend
List (with Friends)
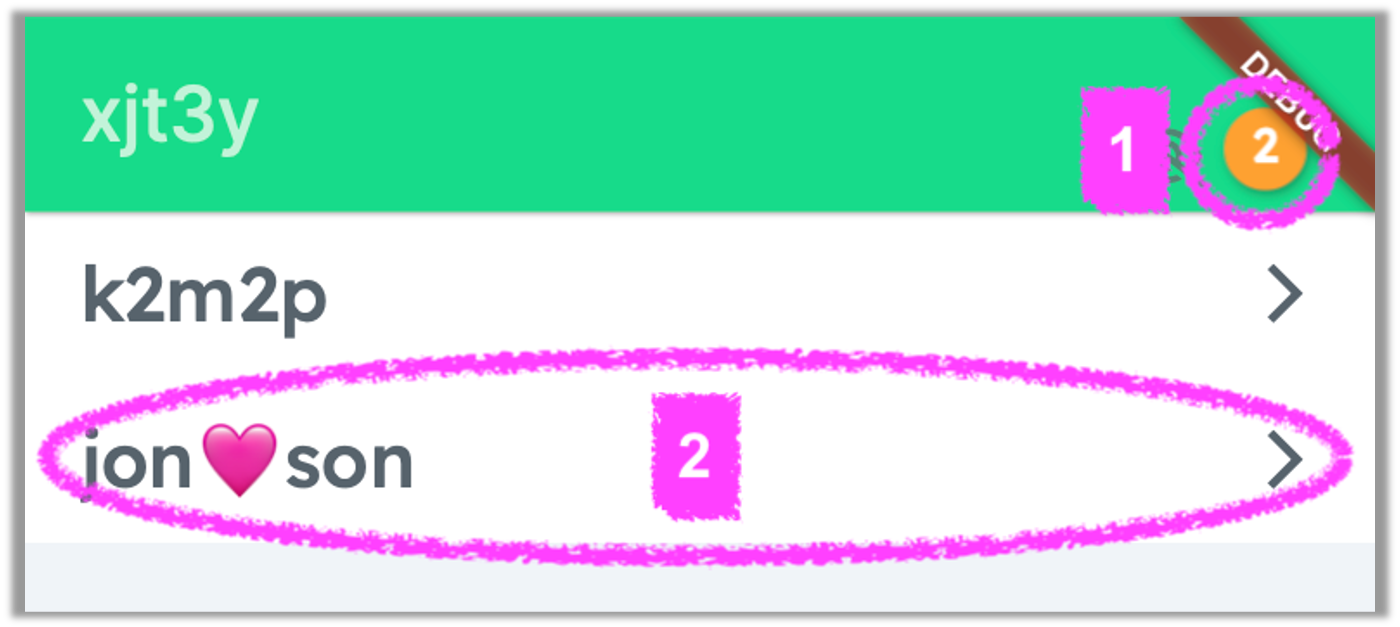
1.
In this example,
the user has received 2 images not yet seen.
2.
Tap on the name
of a friend in the Friend List to see if they sent you any messages.
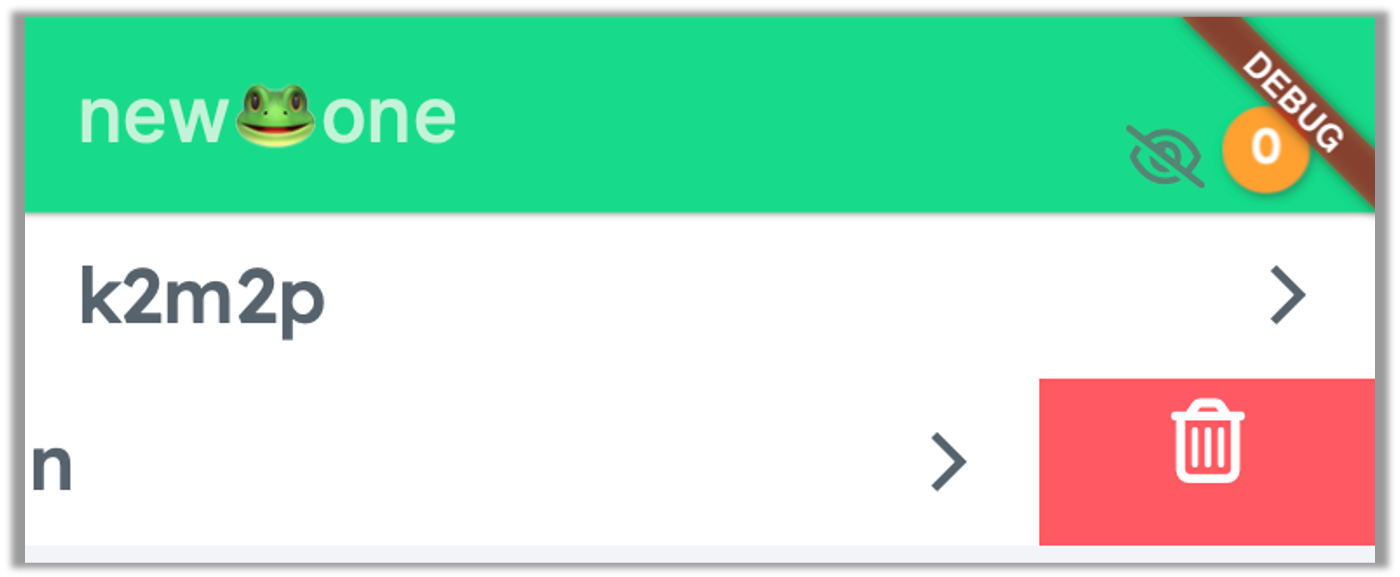
Note: If you want to delete a
friend from your Friend List, drag the friend’s name to the left and then hit
the Trash Can icon as shown here…
Viewing
Messages
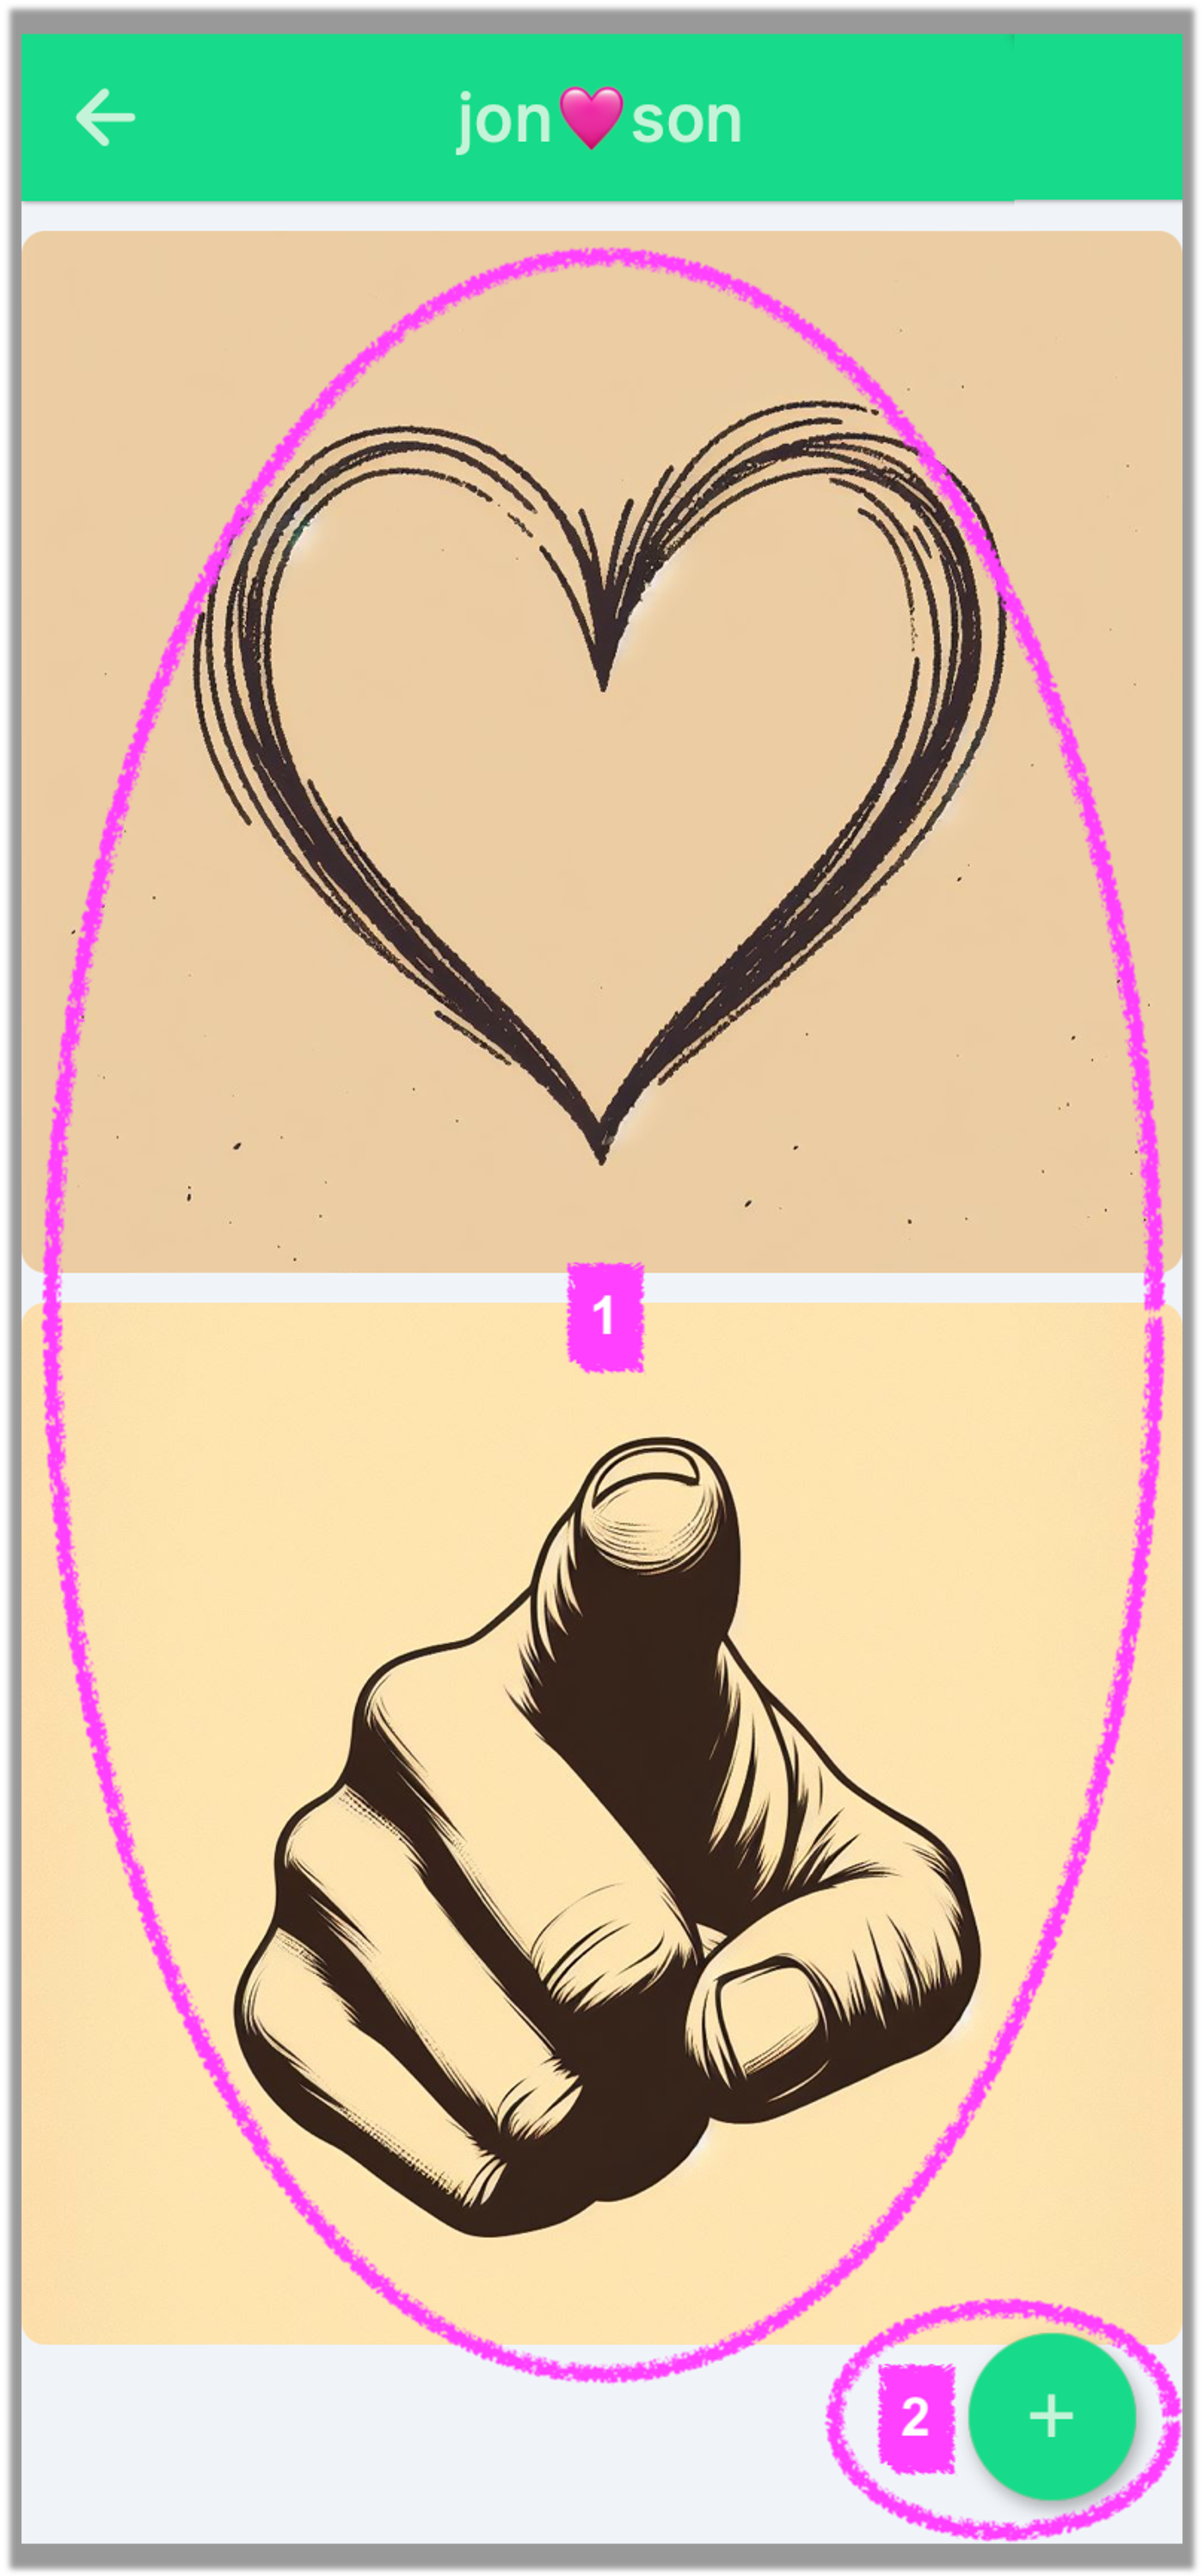
1.
In this
example, we see the 2 images that a friend sent. Ahh… it appears that by using
these 2 images together (first the heart and then the pointing finger), the
message translates to “Love you!” or “I love you”.
2.
To send a
message to this person, hit the Plus button in the bottom right corner, and
then choose which images you want to use to create your message.
Note:
In this example, the friend that sent the messages is jon🩷son
as that username is shown on the top. If jon🩷son
did not send you any message, then this screen will be mostly blank, but you
can still send them a message by hitting the Plus icon.
Sending
Messages
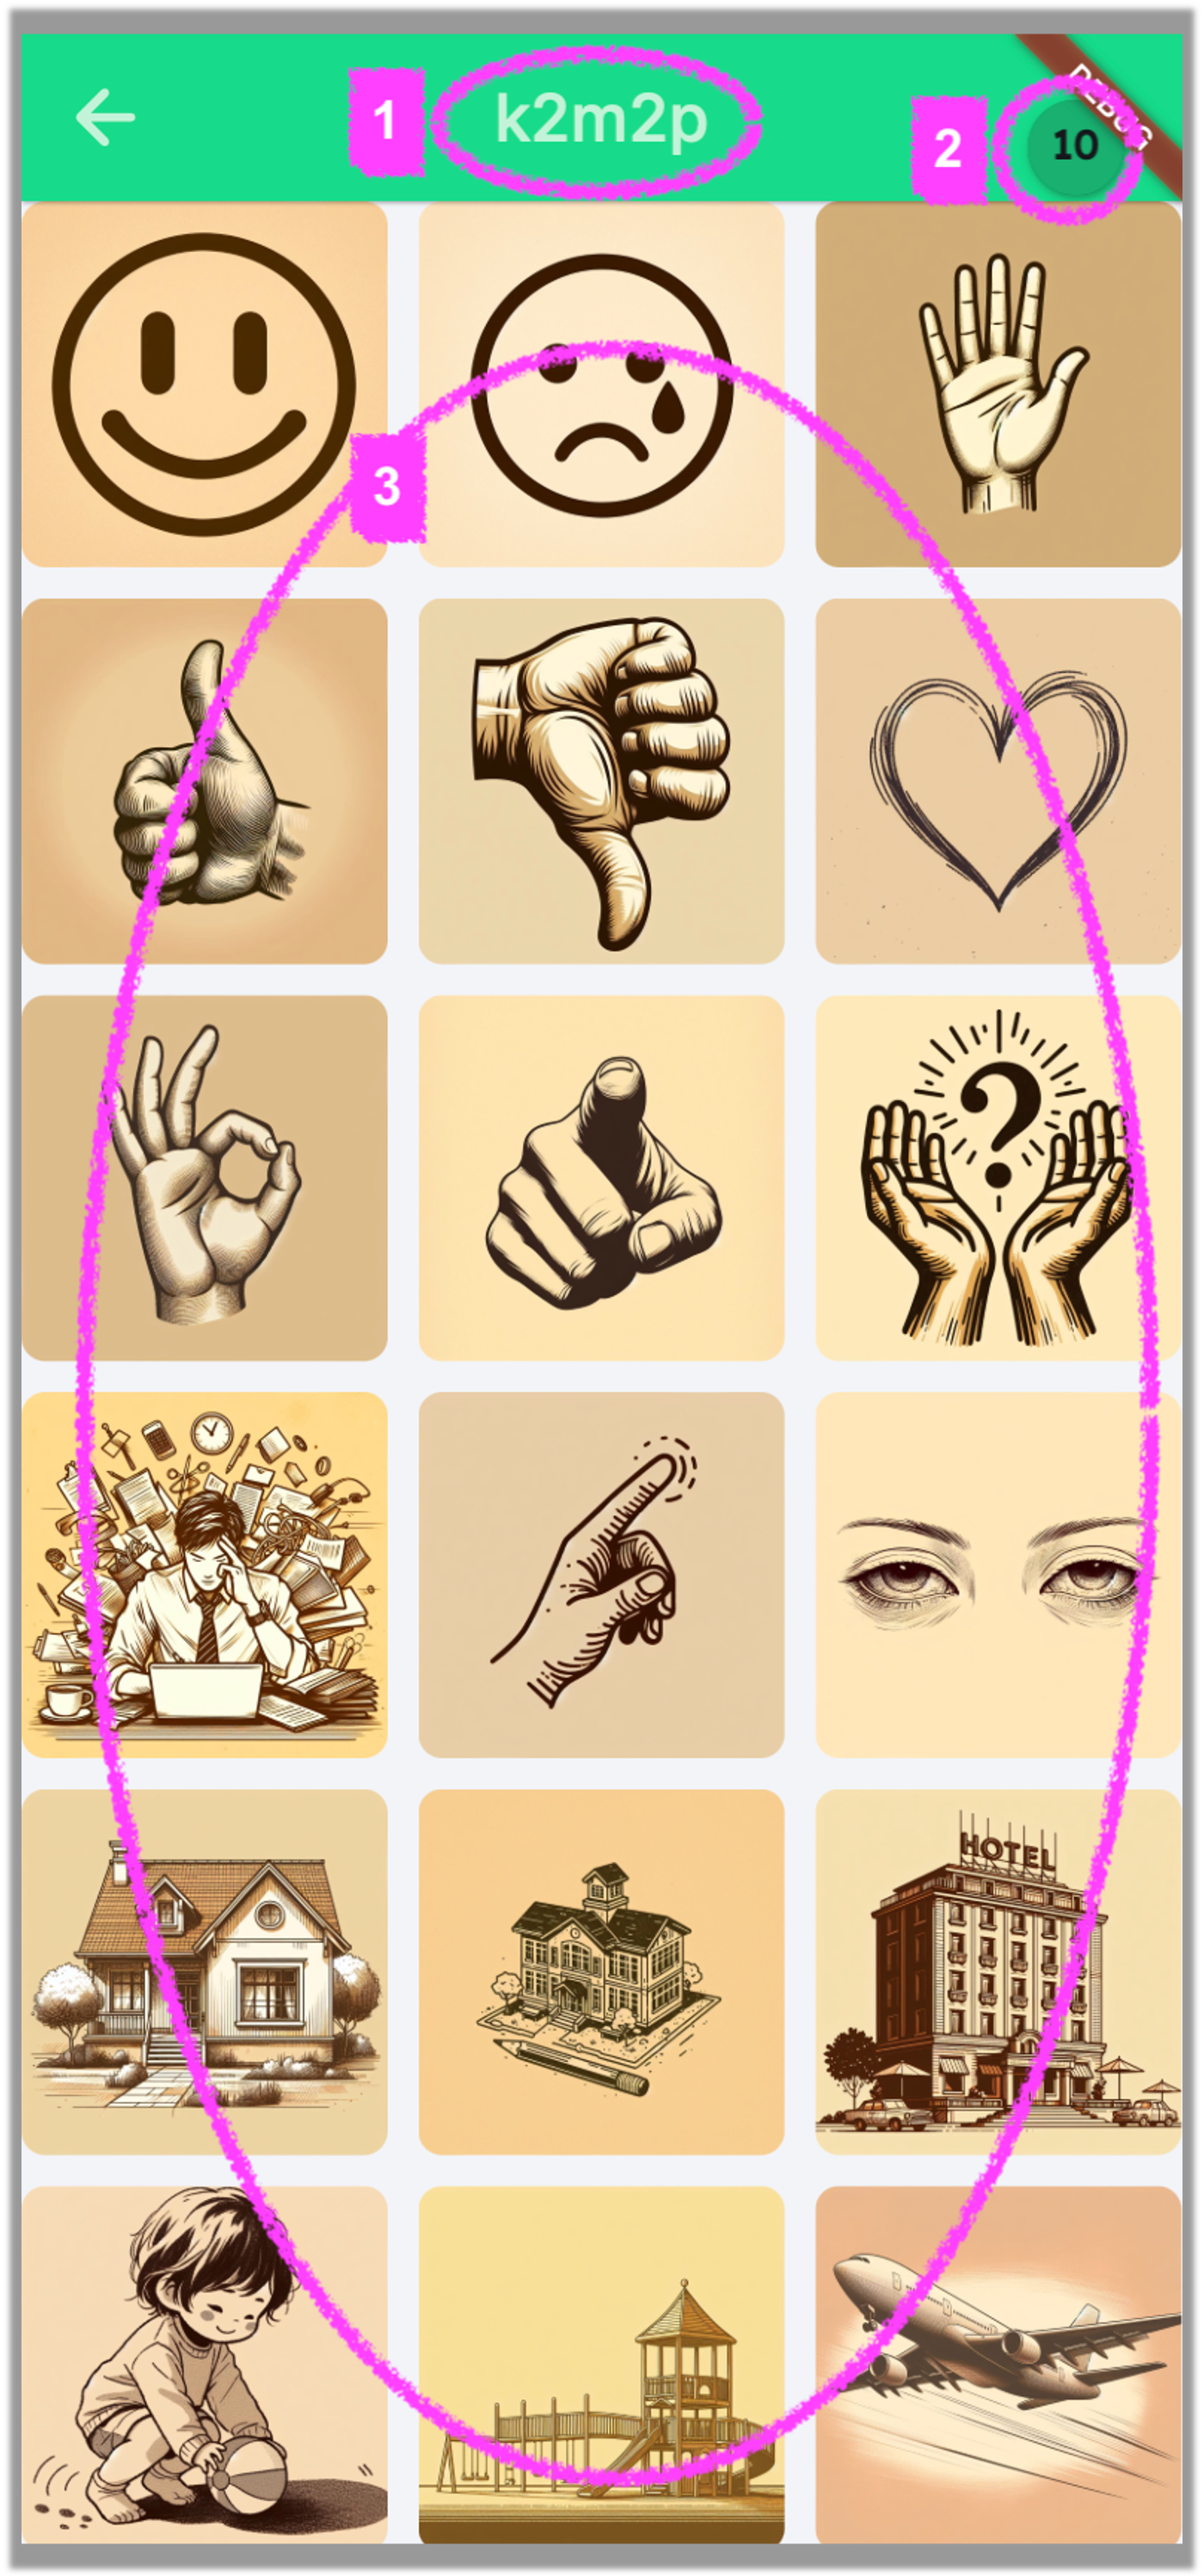
1.
On the top
middle, it shows which friend you would be sending the images to.
2.
On the top
right, it shows how many images you can still send this friend.
3.
Just tap
quickly on an image to send it. If you tap-and-hold on an image, it will
enlarge (but not send). After an image is sent, you’ll get a confirmation
notice below and the counter in the top right will count down.
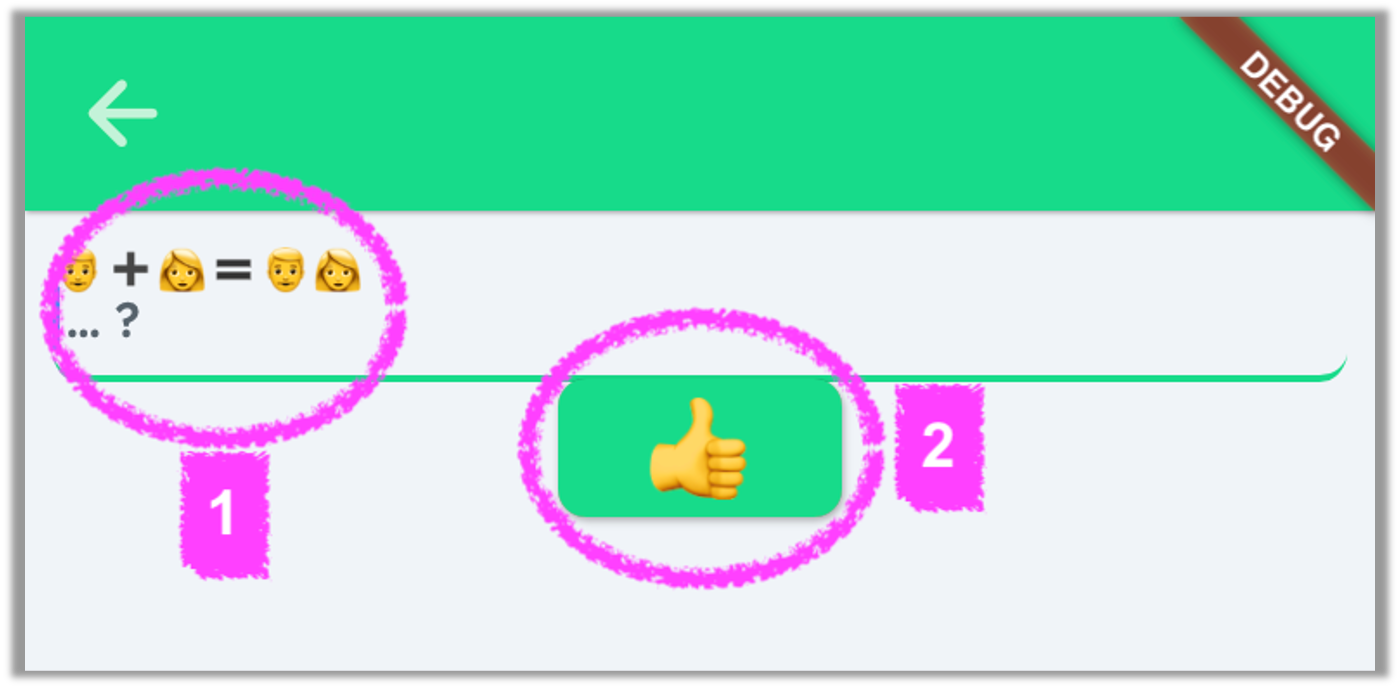
Note: Everyone can receive
& view up to 10 images from each friend, at a time. Once the receiver views
the images, they can delete them to make room for more images to receive. It’s
good practice to always delete images after you’ve viewed them. To do this,
simply hit the Arrow (back) button on the top left of the screen. Then the
following screen will appear…
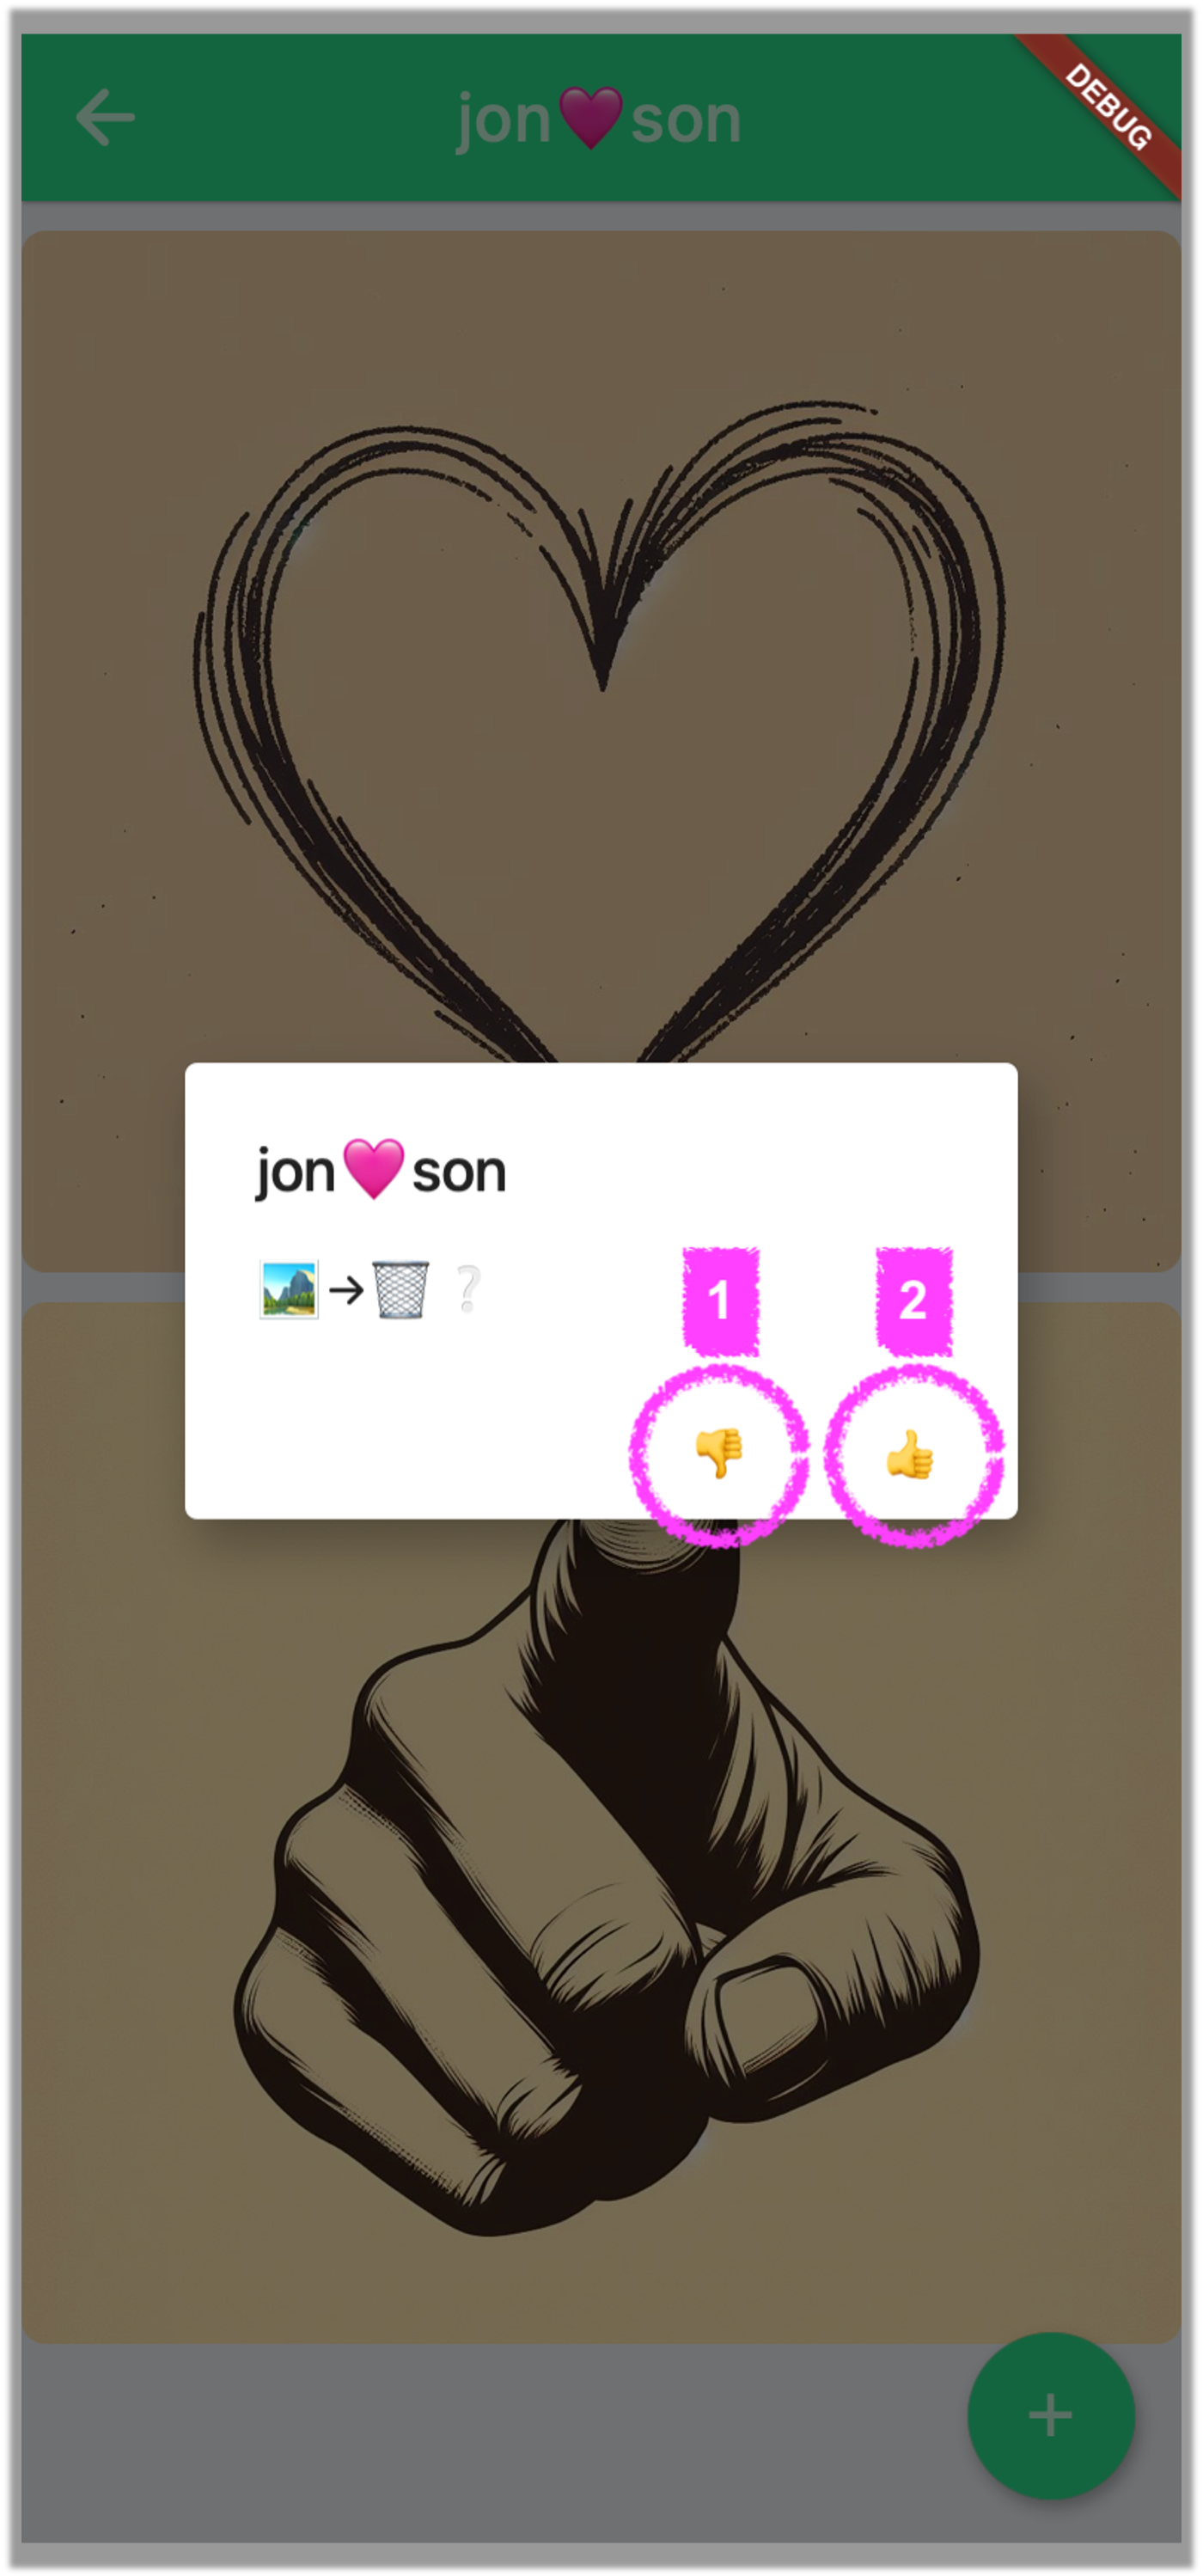
1.
If you hit
the Thumbs Down icon, it’s like saying “no” and the images will not be deleted.
2.
If you hit
the Thumbs Up icon, it’s like saying “yes” and the images will be deleted. It
is recommended to delete messages you have already received to make room to
receive new ones.
Change
Username

1.
As mentioned
earlier, you can change your username by simply holding down on your username
until it becomes editable. Then, edit it.
2.
You may also
delete your username (and therefore your whole account) by hitting the Trash
Can button. If you do this, then you’ll have to start over again as if you
launched the app for the first time.
Note: When you change your
username, it will automatically change on your friend’s Friend List. If you
delete your username, your sent messages to any friend will also be deleted,
essentially leaving no trace behind.

When you are done editing
your username, hit the Thumbs Up button to accept it!
Still need more help or have any suggestions for us?
Use the contact
form to get in touch.
2024+ @ cosmobi